The Parts We Told You About
Largely due to our fully nomadic nature, we only carry parts with us that will “save the day”. Because of that, we often find ourselves sending RV owners to Amazon.com to pick up things they need for us to install or for themselves to install from their home base. There are also a ton of products we use ourselves while camping that we can recommend because we know they worked for us.
We’re putting them all here as Amazon links to make finding the right parts easier. We’re doing it as Affiliate Links because… well, why not? We’re nice people and deserve a little kickback that costs you nothing. 🙂
This section will evolve as we make actual recommendations to people. We might even do a newsletter at some point about why you would want the thing we just added.
Solar Stuff
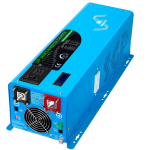
Our current inverter. It is an interesting match for our motorhome because it makes a little better than 30 amps, single phase. This works with our load shedding power management system perfectly because the bonded hot lines make it look like 30 amp shore power.
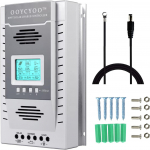
Our current charge controllers. These are a perfect match for our 180W panels by doing two parallel sets of two series panels (2S2P). Each set of 4 panels makes 2 x 10 gauge wires through the roof to the charge controller. We use three of these controllers in parallel at nowhere near their max output and never with cooling fans running.
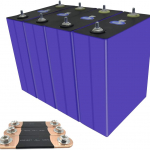
DIY LIFEPO4 cells. We did not get our batteries through Amazon, but we believe this is the same warehouse. NOTE: The listing says 280AH and 300AH, but the weight of the cells matches our 280AH cells, so they’re probably 280AH. At any rate, they’re so inexpensive, doesn’t really matter.
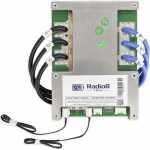
This is a rebranding of a common 120A 12V BMS. We actually have 3 different “brands” of this exact same controller. They all work the same with the same phone app.
Our current transfer switch. Current power to the breaker box is the “generator input” and the inverter is the “shore power” input. A separate tap from the “generator input” goes to the charger function of the inverter in our setup. Using a transfer switch in a motorhome with an Intellitec power management system is a complex topic, so only get this if you know what you’re doing!
![]()
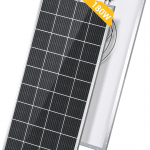
Our solar panels. We actually have both these 9BB and the older 6BB versions and we can attest to the 9BB version being a bit friendlier to the shade cast by our rooftop ACs. Our configuration uses 12 of these in 3 strings which each have 2 parallel strings of 2 series panels. We generally see about 40 volts at the charge controller at around 16 amps in winter boondocking mid-solar-day. That’s much better than we expected and delivers 45 to 50 amps of battery charging for each set of 4 panels.
We used these solar tilt mounts. I’ll probably write a whole article at some point on tilt mounts, but based on the performance we got in the heat of summer, whether you tilt them or not, the air space seems to really matter. I don’t think I would ever use a “Z bracket” system just because you can’t clean and can barely see under them. Also, we got an unexpected benefit from the air space: It’s like having built in shade for the covered part of the roof, which for us is nearly the whole thing. We noticed a difference in daytime heating inside.
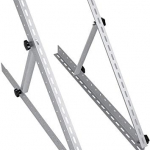
NOTE: Do not actually buy this from Amazon! Go to Lowe’s or Home Depot because 10 foot sticks are about $30 (as of the time of writing this). They should be raised up above your roof using a UV safe rubber spacer washer and a high profile flat washer. Use a stud finder to locate the primary hardpoints in the roof and use those to mount the strut channel, then use the twist in channel nuts to hold the tilt mounts. There are plenty of videos on YouTube describing why using channels is better, but we added the washers so water could easily run under them.

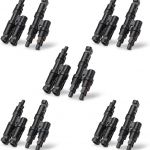
We have 12 panels which end up in 3 sets of 2 wires through the roof. These combiners do all the parallel connections to get from 24 wires down to 6 wires. (It takes 6 of them for our configuration of 6 sets of 2 in series being grouped into pairs for the wires to the charge controllers.)
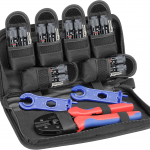
We ended up making various connections and jumpers to get all of our panels placed, paralleled, and through the roof port to the charge controllers. Most people don’t already have this tool, so here’s the one we used. It worked well.
One of the trickiest parts of the project was trying to figure out how much of the various expensive wires we needed. This is a good wire offered in various quantities and even gauges. It worked well for us.
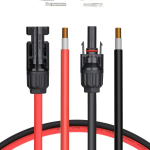
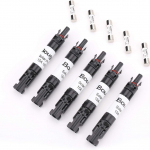
Putting fuses on paralleled sets of solar panels is pretty important because it keeps a short in one string from turning another string into a fire hazard. The reason the parallel points are fused is a topic with a few good articles and videos.
PRO TIP: If you’re wondering why so many of the things we bought were BougeRV brand, it’s because MC4 connectors from different manufacturers aren’t always a perfect fit. BougeRV had good (and usually the best) prices, so we stuck with them for everything MC4 related.)
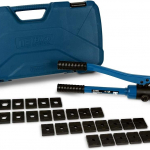
If you don’t have one of these and you’re going to be doing a lot of work with battery cables, you’ll want one.
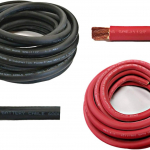
If you’re going to be doing a lot of work with battery cables, you’ll need some of this too. This listing is TEMCo brand. We’ve always been happy with the quality and ease of use for their fat wires. If you go for a cheaper wire, be our guest, but you only want 90C wire and you want the tiny-stranded version. The strand size is important because of the way current travels along surfaces (a topic for a long video).
WARNING: Selecting the correct gauge of wire is not as straightforward as finding a chart online. House wiring requirements are different than battery cable requirements. The TYPE and LENGTH of the wire plays a huge role in which gauge you can safely use. Bigger is always better in all ways EXCEPT cost and weight. DO EXTENSIVE RESEARCH because the Internet is full of not-very-informed experts on this particular topic!!!
Also in the realm of battery cable building, you need a way to make a clean cut on a big wire. These work amazingly well! With a little finesse, they also serve as wire strippers.

Adhesives and Sealants
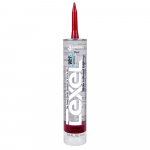
Amazing flexible adhesive sealant you’ve seen us use to seal all kinds of seams and screws (4 pack of hand tubes):
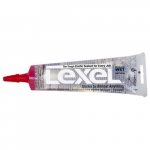
Amazing flexible adhesive sealant you’ve seen us use to seal all kinds of seams and screws (1 pack of calk gun tube):
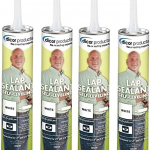
Good ol’ Dicor Self-Leveling LAP Sealant (white):
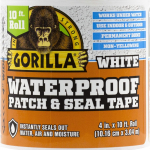
What tree branch? :-/ Our current favorite roof patch tape.
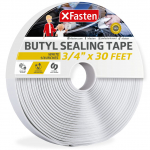
Butyl Tape (for window, water heater, etc, through-wall installations)
Suburban Water Heaters
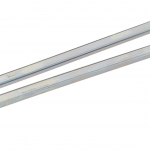
OEM Aluminum Anode Rod (pricy)
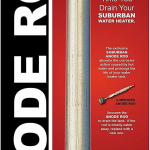
Non-OEM 2 pack of Aluminum Anode Rods (not pricy)
OEM 120V Heating Element
OEM Ignitor Board (Remember, it’s NEVER the board… unless it’s the board.)
OEM Power Switch – NOTE: When replacing, be careful of the right angle blade connectors on the back of the switch!!! Pulling straight out will pull the wires off and require pulling the entire unit to connect the new switch.

Water System Protection and Cleaning
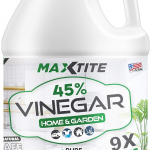
Concentrated cleaning vinegar for water heater mineral buildup and disinfecting.
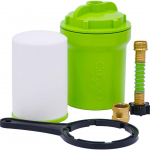
Clear2o DIRTGUARD 20 micron back-flushable sediment filter. These take a replaceable filter which has lasted us a really long time
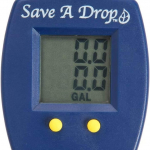
The Water Meter we’ve been using for 5 years. We tried the fancier with brass ends and they didn’t last very long.
The only waste tank treatment you need!