Snapshot of One of Our Checklists

CHECKLISTS: Love Them or Hate Them, They’re Your Last Best Defense

Today I’ve decided to write about something that constantly becomes a conversation with our beloved clients. I’m going to break this down into a few sections because it might be a bit long, and if reading it in one chunk isn’t practical, I hope you’ll at least come back a few times and take in the whole thing. Time is at a premium right now and I’m sacrificing some to write this because it’s important, in some situations, even life-saving important!

Background

Once upon a time, long (LONG) ago, when I was a young man, I had an incredibly agile, organized memory. When a task was at hand, the steps of the task magically arranged themselves on a sort of special blackboard in my head. As I performed the steps, they would also magically, and very securely, be wiped from the board. I never missed a step. If there were contingencies or variations required, the blackboard just rearranged itself and on I went relentlessly towards completion.

This ability/habit was actually quite a bother in flight training, where checklists often mean the difference between life and death. Although I was a natural at “stick and rudder work”, chartography, radio communications, the physics of flight, and even immune to motion sickness, the use of a physical checklist turned out to be my biggest weakness. I had absolute trust for my friend and flight instructor, so I committed to making it happen.

Then, one day, he proved to me it was necessary. As we were doing a preflight inspection, he noticed I wasn’t using the flip pad of all the plane’s various checklists. He set me up by “discovering” a potential issue with one of the landing gear tires, then led me away from the next item on the checklist by jumping in and covering a few things to “make up for lost time”. As we settled into the cockpit and I reached for the ignition key, he asked, “Did you take the sock off the Pitot tube?” He had me. The consequence would be no airspeed indication and it wouldn’t have been obvious until our takeoff roll. Since the flight characteristics of a plane are very dependent on airspeed, having no indicator is inherently dangerous.

Flash forward to the RV arena a few (OK, OK, more than a few) years later. I knew from the beginning that working with the heavy equipment of a 10,000 lb. truck and a 17,000 lb. fifth wheel camper was dangerous business. I had already seen others have accidents both small and large. I paid careful attention to how various situations had unfolded to avoid them myself. When it was time to start hitching that monster camper to my monster truck, my first move was to make a checklist.

One checklist grew to many checklists for different phases of our travels. Eventually Michelle discovered Changing Lanes on YouTube and we adopted their division of checklists into activities that can happen at “T-24”, “T-12”, and “T-0” (think T minus hours to take-off). We eventually expanded on that idea and our lists are now a comprehensive suite of both necessities and conveniences that we just don’t have to think about (or stress about) as we ramp up to one of our frequent drive days.

The Objections

I’m going to stop right here to acknowledge the nay-sayers. As I said above, checklists can seem like a bother and, under normal circumstances, add a layer of “busy work” to a task. Complaints we’ve heard are:

  • I don’t need a checklist because it’s like second nature at this point.
  • Checklists are for newbies.
  • Checklists make things take longer and I could be using my time more wisely.
  • If I needed a checklist to go camping, I shouldn’t be camping in the first place.
  • My mind is sharp as a tack. I never forget anything.
  • Checklists are too tedious.

There are many variations on the above, but you get the picture and may have even used some of these yourself. As I said in the Background section above, SO DID I during flight training.

The Reality

It’s not that any of the objections are incorrect in perfect conditions, it’s that the real purpose of a checklist is to ensure a consistent, and often safer process when conditions are not perfect. Aside from the truism that life isn’t perfect, here are some ways we’ve personally experienced and witnessed imperfection around breaking camp:

  • The Chatty Neighbor (or Relative): This one is almost an absolute in campground environments. You’ve lowered the hitch onto the ball, but before you retract the tongue jack, it’s time for heart-felt goodbyes. Afterwards, it’s time to get things back on track and next up is a bent tongue jack because raising it was missed in the shuffle. Or an abandoned water filter hanging from the campground hose bib. Or a bent slide because someone forgot to move the camp chairs. Or whatever.
  • Bad Weather: This one includes not only rain, but also excessive heat, dust storms, and even hurricane evacuation orders. Bad weather makes everything rushed, and in a rush, things can get missed.
  • A Cry for Help: Nothing will break one’s stride as fast as a call for help from a spouse or child. In most cases, an interruption ranges from mildly annoying (Bobby won’t stop pulling Susie’s pigtails) all the way to mind wiping (the wife fell off the stairs and at first it seemed her ankle was broken).
  • The Bump on Your Head: You raise up into a slide with your noggin or drop a hammer on your foot and suddenly there’s a certain clearing of the mind that would make a monk jealous. However, are you sure you unplugged the power cord from the pedestal?
  • The Unexpected: You’re happily about your normal routine when something goes wrong. Let’s say as you’re pulling your wheel chocks, you notice some uneven tread wear on your tires. When you’re done making a plan to deal with that, did you remember to raise your stabilizers?
  • The Ringing Phone: No explanation necessary for this one, but I will say in my case, I think my mother has a spy network.
  • The Last Hurrah: You made such good friends on this trip, the campfire was EPIC. It also lasted half the night and you woke up with a dehydration headache from the tequila shots that were going around. This is not a good time to “trust yourself”. (NOTE: If you wake up really hung over, consider you may still have alcohol in your system and must CANCEL your travel day. Punctuality is not worth your life… or a DUI.)
  • To Be Human Is to Be Distracted: As with many of the specific examples above, sometimes we just have “things on our mind”. I think the most distracted year of my life was after my oldest brother and father both died within 36 hours 2000 miles away from each other. I didn’t even realize how distracted until the checklists showed me.
  • My Perfect Memory Failed Me: It happens more often than any of us want to admit. The fact is, when new information comes in, old information has to either get shuffled or dumped to make room after a certain age. Denile isn’t just a river in Egypt, as they say.

Our Ever-Evolving Checklists

Our checklists have really evolved over time. At first glance, it wouldn’t be unreasonable to call them out of control, but here’s how it all unfolded. At first, as mentioned, the most critical (dangerous) part of our camping experience was the only checklist: hitching up our giant fifth wheel camper. Also as mentioned, we came across the idea of spreading out the process of breaking camp to take things at a little easier pace. We took the Changing Lanes checklists and made them our own.

Then we did a few long stays requiring considerable efforts to get packed up to leave, which prompted us to even make a checklist of things we could do two days before departure. We knew we wouldn’t use that list all the time, so it actually duplicates items on our T-24 (day before) checklist. That led to doubling up on some other items on the other lists because sometimes we’re really busy the day before and we want to save items for the day of travel we’d normally do the day before. It’s really no big deal to tick it off more than one list and then we’re extra certain it got done.

Somewhere in the evolution, we realized that some things were just more convenient if we did them in a certain order. A really good example of this is remembering to turn on the propane before the slides come out since our propane hatch is under a deep slide. It’s not just your checklists that evolve because your camping gear changes over time too. With that can come new things to do. One of my favorite upgrades was this step stabilizer for our motorhome power steps. The downside is if we turn the key on with the door closed, the stairs try to retract and if the stabilizer is down, that’s a big problem. Checklist update to the rescue!

What’s In It for You?

So, quick recap here of all the things implied so far. Checklists are the way to:

  • Increase safety
  • Increase confidence
  • Decrease stress
  • Guard against the unexpected
  • Create convenience
  • Hone your process

I don’t think anyone can honestly say they don’t want that list of benefits. Some might say they don’t think the cost is worth the benefits. The problem with that view is either too much reliance on luck, or a lack of experience with the real-world cost of NOT having these benefits. Most nay-sayers are just one avoidable disaster away from being checklist enthusiasts.

Having the Checklists at Hand

Using a checklist is such a simple concept, there’s no need to explain that part. The interesting part can be getting access to the list. Here are some ways we’ve seen checklists presented for use:

  • Permanent Lists: This is more or less the way you’d do checklists in a small plane. There’s a hard list, printed or written, where items don’t actually get checked off, they just get listed and it’s up to you know if you did them “this time” or not. We’re not crazy about this method, because repetition can play tricks on the mind. Did you do it this time, or was that last time? Having something as simple as a tick mark can prevent a costly and/or dangerous mistake.
  • Hard Copy Disposable Lists: This way is very old school, but also very straight forward. It generally requires a printer to get that hard copy, but then at least there’s a place to clearly mark an item complete. The downside is if these are printed in advance, it might make one hesitant to revise the checklist. The ability to easily evolve is pretty important, but again, if this is the maximum tech level you can achieve, it’s 1000 times better than nothing.
  • Erasable Notebooks: In addition to old school notepads you can use with a pencil and eraser, there are notepads out there now with erasable ink. You’d have to hand write the checklist, but you could still have super-simple, the ability to tick items off the list, and reusability. It wouldn’t be great for revisions, but still 1000 better than nothing.
  • Tokens: An interesting way to keep up with tasks is to write them on slap bracelets and put them on the steering wheel. When something is done, you remove that slap bracelet. You can see how Today Is Someday does that on YouTube. Other variations on the same theme include magnets on a fridge and painted rocks in boxes.
  • Smartphone Apps: There are many smartphone apps that can track a to do list. Some are even better at checklists. Although we’ve even seen a few RV-specific checklist apps, we currently use Google Keep, available on Android, iPhone, and webpage so you can truly run it on just about anything. It has the advantage of being able to share a list and more than one person can actually edit the list or check items off at the same time. It also has the ability to uncheck an entire list to start over with a couple of taps. It’s so easy to change our process for both of us at the same time, we are never afraid to have an idea and just throw it into the list. If we don’t like it, we can always change it later.

Our Lists

These are our lists, unabridged, judge as you may. We love them. We depend on them. We wouldn’t have lasted this long on the road without them. They have saved us time, money, and best of all, our health. You can copy and paste these lists into Google Keep by selecting all the lines of a particular list and simply pasting it on a line in Keep. It’ll make entries for each line when you “Turn on Checkmarks”.

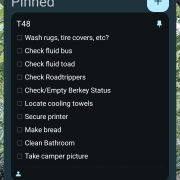
T-48 (Two Days Before Travel)

Wash rugs, tire covers, etc?
Check fluid bus
Check fluid toad
Check Roadtrippers
Check/Empty Berkey Status
Locate cooling towels
Secure printer
Make bread
Clean Bathroom
Take camper picture
Clean Kitchen
Check reciprocity
Download all media
Clean toaster and stow
Plan fuel stop and route
Purchase supplies – creamer, sandwich etc
Fix Steve’s pills
Clean grill and stow
Put sunpass in camper
Clean Instant Pot and stow
Locate cash for tolls
Confirm funds in OpenRoads Fuel account

T-24 (The Day Before Travel)

Program ham repeaters
Clean wiper blades
Charge Doosl
Condition camper bra?
Check fluid bus
Check fluid toad
Check Berkey Status
Locate cooling towels
Clean steering wheel
Do you need to make bread?
Clean bathroom
Take camper picture
Take showers
Clean kitchen
Secure printer
Clean windshield
Check reciprocity
Verify grey tank closed!
Update Apps on phone
Update tech locator
If it’s going to rain, sweep roof, rainex rear camera
Update GPS maps
Make snackle boxes
Sweep/mop kitchen
Check hot water tank
Check toad tires (inflation, general inspection)
Download all media from dash cam and wipe
Clean toaster and stow
Plan fuel stop
Dump tanks if early departure
Return items to their spots
Fill fresh water if boondocking
Purchase sandwich supplies
Prepare travel day dinner
Check Silicone
Check back of refrigerator
Check and Condition Slides
Prepare travel day breakfast
Plan route and fuel (get a feel on gas station locations, rest stops, etc)
Fix Steve’s pills
Laundry
Stow tire covers
Wash camper nose
Turn on TPMS – check pressure
Check engine bay for hitchhikers
Confirm funds in OpenRoads fuel account
Check escape hatch
Put Sunpass in camper
Clean Mirrors
Prune Pikmin Postcards
Check Roadtrippers

T-12 (The Evening Before Travel)

Turn off night light
Make travel breakfast and put in fridge
If boondocking turn charge controllers up
Take down thermometer inside and out
Steve arm brace
Stow Berkey
Get Michelle’s sunglasses
Pack water for Steve
Is Bra secured
Clean Hydraulics
Lock big drawers
Turn off media drive
Steve’s sunglasses
Pack sandwiches/snackle boxes
Check engine bay for hitchhikers
Plug in TPMS repeater
Sweep roof, Rainex rear camera
Show Steve the route and approaches
Awnings in
Bungee rocking chair
Bungee freezer
Take Doodle for a walk
Turn off or on critter lights
Bungee spice rack
Take trash to dumpster
Slides: one last check for obstacles inside and out and basement also
Check slides for water if needed put out postit note
Bedroom A/C and lights off
Stow antennas, Dishy
Locate cash for tolls
Put Sunpass in camper
Bedroom secure (closet door latched)
Clean Instant Pot and stow
Locate walkie talkies put on driver’s seat
Locate all remotes and stow them
Vacuum/Sweep
Bedroom windows closed
Clean windshield inside
Clean windshield outside – Steve
Control Panel Items off (AC, water pump, water heater, ALL Lights)
Bathroom shower secure (everything off shelves, shower door closed, shower head
down)
Secure Toilet Area
Bathroom secure
Move doodles box
Stow computer desks
Living room secure – move rugs to center
Doodle’s food and water bowls put up front
Stow coffee cups
Stow Coffee Pot
Stow any items on counters
Arrange fridge for travel reset thermometers – latch fridge door
Bedroom door secured
Move living room chairs
Turn off propane
Fill fresh tank (% based on next location)
Kitchen secure
Windows closed / blinds up
Pantry door closed and locked
Turn water off make sure all quick connects are stowed
Dump tanks add detergent
Flush toilet (empty all water from bowl)
Remove hitch cover
TPMS ON
TV on bed
Turn on camera
Plugin LevelMate
Lock hatches
Prepare for travel Internet (GPS,stow Dishy)
Start Coach – Verify step stabilizer is up!
Slides: Retract with door, vent, or window open for air flow
Raise Jack’s
Check all lug nuts
Check jack shoes and inspect tires
Stow jack blocks
Secure Electrical and plumbing (water hose, power cord, poop hose)

Before Move to Hitch Toad

T24, T12, T0 complete
Turn on galley fan
Confirm jacks up – stow chocks, check feet
Inspect Rig wheels inflation and suspension
Propane off
Turn off all electrical loads
Put towels on slide (if needed)
Check air system moisture ejectors
Check lug nuts
Put outside mats away
Verify all hatches are locked
Confirm tanks closed
Turn off main ac switch
Air Brake test (if its been 3 months)

Hitching

Check departure time
Set car timer (7 hours)
Grease hitch
Remove hitch Cover
Remove stow pin
Lift hitch into tow position
Hitch Toad
Replace stow pin
Put sunscreen on
Check toad and buss tires
Lock tongue
Put windows up
Connect Electrical cord and Breakaway cable.
Flip ignition breaker from Toad
Put car in neutral
Parking break OFF
Confirm steering wheel unlocked
Verify all lights are operable (signals, brake)
Check propane off
Remove any items from car
Lock car doors

Before Take-Off (All Hitched Up and Heading for the Highway)

Secure main entrance (check steps, lock door)
Validate TPMS reads all tires and validate pressure / temperature
Setup GPSs
Verify Pandora Connection
Clean Steve’s glasses
Check mirrors

Fuel Stop/Pit Stop (Before Hitting the Highway Again)

Do you need a Lottery ticket?
Fuel additives
Reset trip one
Clean glasses
Hatches locked
Check hitch
Bathroom break
Clean windshield?
Full walkaround
Start car?
Reset car timer?
Doodle walk
Refill water glasses
Propane off?
Fuel cap
Lock door

Overnight Take-Off (If we did an overnight stop without setting up camp.)

Reset fridge thermometers
Front stairs
Start toad and set toad timer
Fridge Latched
Electric, Water, Sewer (if connected)
Hatches locked
Check roof?
Make sandwiches
Check wheel hubs
Shower area
Bathroom area
Bedroom door locked
Blinds up
Chairs moved
Antennas stowed
Everything off counters
TV secure
Fans on
Bedroom slides
Main slides
Bedding accessible
Office chair stowed
Doodle box accessible
Water pump off
Water heater off
Toilet empty
Check hitch
Steve’s office stuff
Microwave empty
Coffee pot stowed
Check pigtail
Check tires
Dash cam mounted
Drone footage?
Clean our eyeglasses
Air/Heat off
Hatch keys in camper
Check lights
Car neutral, no brake, key on, breaker tripped
Check TPMS
Clean windshield
Doodle food stowed
Check camera
Propane off
Secure car

BONUS: Going On a Mission (This helps us document our adventures.)

  • Objective
  • Where We Got the Idea
  • Potential
    • Rewards
    • Challenges
  • Expected Effort/Difficulty Level
  • Preparations
  • Costs
  • Gaining Access
    • Competition
    • Requirements
  • Transit
  • Major/Minor Objectives
    • Lead Up
    • The Thing
    • Impressions
    • Unexpected Features Positive and Negative
  • The Thing
  • Impressions
  • After Thoughts
    • Positives
    • Negatives
    • Worth It?
    • Tips & Tricks
    • What We’d Do Differently Next Time
  • Summary/Final Thoughts

ANOTHER BONUS: Location to Remember (These are the things we try to do at all the areas we visit.)

Post video about our arrival in FB group
Is there a hot tub?
Talk to a Neighbor
Visitor Centers
Use campground amenities
Do something from the hobby stash!
Sit outside and enjoy the weather
Participate in campground activities
Cook outside (are there clams?)
Have a campfire
Go to Attractions/Roadside Stuff/Local Color
Document: Pics, video, drone
Hike
Fish
Farmers Market/Butcher
Fix something on the camper/maintenance
Do something musical
Curate media for a location, update the slide show
Scenic Drives
Eat at a local restaurant

Tank sensor display panel

Offering a New Service, Sort of by Accident

Our Tank Sensors Stopped Working

As often happens, a problem with our own motorhome pushed us into doing another “we’ll never do that” service. Like just about everyone else, our black tank sensors eventually started reading 3/4 just about all the time, no matter what was really in there. Our tank sensors are on the outside of the tank, so there’s really only one thing that will cause that a good flush won’t fix: struvite. Struvite is commonly referred to as “kidney stones outside the body” and naturally accumulates anywhere there is human waste. Waste treatment plants spend a large portion of their budget every year just keeping a handle on this stuff. It forms sheets like a sandy shale that first coats the bottom of the tank and then creeps up the sides. When it reaches the sensors, whether inside or out, they can no longer do their job. Most struvite is found in black tanks, but it’s not unheard of to see some flushed from the grey tank as well.

What’s the Fix?

The only answer for an RV waste holding tank is something called a hydro-jet deep cleanse. This is the process of basically power washing the inside of the tank using some specialized tools. Done on both black and grey tanks, it blasts out the struvite, soap scum, bacon fat, black mold, roaches, and other things that should’ve never been in there. It’s definitely something we can do as Certified Advanced RV Repair Technicians, but dang. Almost nobody is wired to enjoy working with poo. Just the same, one of the commitments we made before we went pro was to not pay someone else to do what we were paying so much to be able to do ourselves.

So We Did a Thing

A quick shopping spree later and we were exploring the treasures of our holding tanks. Since we’re well trained on such things, our tanks were thankfully free of all but the impossible to control, namely struvite in the black tank and black mold in the grey tank. Both tanks were dumped and filled with fresh water (our camper has a flush system), and dumped again, but the amount of material that came out of these tanks with the hydro-jet was shocking. It hasn’t been done to this camper since we bought it 2 or so years ago and who knows when (if ever) it was done before that.

The end result was better than we’d hoped. Our black tank sensors now work again. As a bonus, our grey water is now completely odorless except for a slight hint of the fruity shampoo Michelle likes.

Now What?

So now we have this equipment we never wanted and can do this thing that we never wanted to do. Should we offer this as a service to others? Remember the healthy natural aversion to working with poo? Well, your own poo can’t generally make you sick. That is, however, a definite risk when working with other people’s poo. On the other hand, this is the single most turned down request we get. It would be good to stop saying, “Sorry, I can’t help you with that.”

Is This DIY Maintenance?

On a side note, “Sorry,” is all we can say because we would absolutely never recommend someone run out and buy the equipment to try it themselves. A prerequisite of doing the job is a full understanding, from the inside out, what the waste system is made of, and how those parts are assembled. Beyond that, you either have the finesse to get the tools in and out of there without getting them stuck, or you don’t. There’s no good way to describe all the sensations required to blindly navigate the plumbing to get the tool into the tank, but if you fail at that, it just means you can’t finish the job. Where things turn super ugly is getting the tool into the tank and then it gets stuck. If that happens, you better have the skills to start taking things apart from the belly up and the stomach to reach into scary places, because just leaving the tool in there will pretty quickly make the system unusable.

Our Decision and Why

Anyways, we now officially offer this service. The deciding factor was our original commitment to serving the full-time community and that is the most impacted segment out there.

It is “recommended” (especially by people who offer this service exclusively) to have this done annually. We don’t want to start any industry in-fighting, but we won’t be recommending that to anyone who uses their RV for traditional recreational purposes. Unless there’s evidence of a problem, hydro-jetting tanks is more of a repair item than a maintenance item. It will generally wait until there’s a reason to do it, sensor problems, smells, clogs, that sort of thing. Many RVs make it to the junkyard having NEVER needed a waste tank deep cleaning.

The full-time community, however, has different concerns. These wastewater systems were designed to handle simply holding waste for a weekend or occasionally for a week. The struvite build up would take years to affect anything under that use case. But when living in an RV, the waste tanks are under special strains. (It is important that in all use cases, the tanks remain closed until ready to dump, but that’s another topic.) With material being in the tanks 365 days a year rather than only, say 36 days a year (which would be pretty heavy usage for most recreational users), that amounts to a decade of buildup every year!

Added to the increased impact of usability problems on full-timers making an ounce of prevention worth several pounds of cure, periodic deep cleaning is definitely required maintenance. The frequency of that maintenance is up to the full-timer. There are differences in conditions that can’t be simply boiled down to “every year” for this one. A family with 2 (or more) children might find it comforting to get it done twice a year and never worry about those tanks. An experienced retired couple might find that their excellent tank maintenance skills will let them stretch it out to every couple of years. Others might roll the dice and wait for the situation to be untenable before spending the money. Every answer is correct for the person making the decision.

Got Fries? I Got Catch-Up!

I decided to do a quick catch-up (see what I did with that fries thing in the title?) in case you’ve been wondering why there haven’t been any new blog posts in quite a while. It’s not that the reminder for “Steve, did you update the blog?” hasn’t gone off every week in all that time. I’m guessing everyone these days can easily spot “been busy, got behind” when they see it.

So here are the highlights of what made up our “been busy” so far this year:

Finishing the Great Solar Install of 2022/2023 – We started a 2160 watt, 1100 amp hour solar install in the summer of 2022, but got waylaid when we discovered some heavy roof damage which only became apparent when we started trying to screw solar panels down. It took until January 2023 to get into a position to tear the roof apart and fix it. The fix wasn’t ideal and we’ll have to do it again when we have more time and a 20 foot tall shop to do it in, but it was enough to get by for a few years. Then it was time to finish mounting panels, move our 5 LiFePO4 house batteries to a location where our new inverter would fit, and install a second transfer switch. In total, we spent about 2 months as our best and only customer. In those 2 months, we saved ourselves somewhere around $40,000 in labor costs, so I guess it was worth it.

Boondock-a-Polooza! – We’ve been to some really remote locations this year. With our new solar setup and the addition of Starlink internet, we can now roam to sooooo many places which were off-limits before. We’ve enjoyed old favorites like Imperial Dam near Yuma, AZ, and the La Posa Long Term Visitor Area near Quartzite, AZ. The difference was this year, we could stay as long as we wanted! We enjoyed new locations like Arches National Park and Canyonlands National Park from a BLM campground called Horse Thief with no worries. We popped over into Mack, CO, for a stay on Rabbit Valley BLM. Then it was off to the wonders of the Big Hole River near Divide, MT. All of this time was spent with no electrical, water, or sewer connections and most of it was with no cellular service. It was all absolutely STUNNING! We plugged into power for a total of 10 hours from the end of January all the way up to mid-June.

Weird Medical Stuff – I won’t bore you with the details, but ever have one of those years where every time you turn around, you broke something else? LOL We’re both doing fine, though, so no worries. It just took up time with treatment and recovery periods.

Day Job Drama – As everyone eventually finds out, we both continue to do consulting in a field we don’t really like. Mixed into the months since our last update was one of those lovely crunch times where multiple projects needed us. Being good at something is sometimes as much a curse as a blessing.

And of course, RV WORK! – The part we like the best has steadily marched on. We’ve seen damaged slide systems, broken plumbing, failed tank sensors, leaky grey tank outlets, soft start installs, awning issues, hydraulic leveling cylinder seal failures, tankless water heater lock-outs, RV manufacturer assembly failures, and much, much, more.

Hopefully, we’ll be a little more on top of the blog. I always say that because I really do enjoy writing these. But, as always, we’ll see how that goes.

Stay safe out there!
RV Tech 4 U

Two cheerful vacationers

A Quick Note After Vacation

Hello and welcome back (to us) from vacation! We decided to pop a quick note in the journal to refer back from other entries which we’re going to do retrospectively for the summer months of 2022. We didn’t write anything up because we were BUSY. Crazy busy. The kind of busy that leaves you absolutely exhausted with no time to even remember you have a journal. So, we’re going to go back and pick the most interesting or informative job from each month and fill the gap.

As for the vacation itself, it was a mixed bag. We decided to go to Key West, FL, this year. We’ve never been and watching all our travel YouTube channels, it seemed like a cool thing to do for a week. Sadly, it was not a great location for us. We ate, drank, walked, rode, drove, and stumbled our way all through that little island, and the hard fact was we were paying way too much for unexceptional experiences. On the upside, we did make it down to Bahia Honda (bay-ee-uh own-duh) State Park for a little snorkeling on the last day, but we can’t credit that to Key West. BH is a reasonable day trip from Homestead and doesn’t require the $150+/night campground on Stock Island.

It was, nonetheless, a very helpful break. We got so incredibly bored by the end of day 4, we went to Publix, bought groceries, and basically opted out of the rest of the island. We also got so incredibly bored, we accidentally rested up. When the trip was over, all of the sudden there was a burst of productivity and lots of nagging old items on the to do list suddenly found themselves handled. The vacation may not have been worth the money, but it definitely accomplished something.

If you do happen to visit Key West, I will say the only two worth-it food experiences we had the whole time we were there (out of $1400 in restaurants and bars) were Roostica on Stock Island and Croissants de France de Stock Island. Roostica is a very interesting place to get wood fired pizza. We happened to be there on “gravy night”, which is a spaghetti dinner special. Don’t be alarmed by the absence of pepperoni from their menu because they absolutely have pepperoni pizza. They use a special salami in place of pepperoni and, trust me, you won’t be disappointed. As for the Croissant place, it was a little pricey, but their sandwiches were definitely not something you’d find at a common deli.

So here we are. Rested, poorer than we expected (if you missed it, go check out the October entry), and ready to have a great year.

Hope to see you out there sometime soon!

Top of the engine head with rockers and injectors

Boondocking for 17 Days in a Diesel Shop Parking Lot

This note is going to be a little different because it’s about a repair to our own camper performed by someone else. I’m going to be pretty specific about some of the details, but before you bounce off the article, know that the reason this repair took 17 days was solely the fault of our aftermarket warrantee company and their repeated attempts to get us to pay for this expensive repair ourselves.

I’m going to resist the urge to launch into a technical expose of the rig, the leaky injector harness socket, and the sticky injectors which caused us to need thousands of dollars of repairs on the engine. I’ll keep it to two main points, instead.

The first point is if you have no choice but to let a motorhome sit, you should just sell it. Some people will take exception to this, but these things are made to roll. (If it’s a long-term spot at a campground, you’d probably be happier with a fifth wheel or park model anyway.) Both the leaky injector harness and sticky injectors, which both happened right around 100k miles on the odometer, were way too soon for this type of engine. According to a two different master diesel mechanics, the problem was sitting for well over a year at some point in the motorhome’s existence before we acquired it. A sit that long allows all the oil drain out of the engine. There’s more to the chemistry, but that’s the layman’s version. The consequence was the seals shrinking and cracking on the wiring harness and the injectors developing considerable mechanical and hydraulic resistance.

What is the right way to address “exercising” a motorhome engine when you’re stationary for a long time? Most diesel engines consider starting more than 36 hours after being turned off “extreme operating conditions”, so from a certain standpoint, recreational use will never be enough for the design of these big motors. If you’re going to start them up, once every month seems to be the interval to keep them oiled enough to be shelf stable as long as the starting temperature of the block and the outside air temperature are both above 40 degrees. Starting them more often than that, if they’re stationary, is just more instances of “extreme operating conditions”.

Starting them when they’re really cold should just not be done unless it’s time to get on the road. If you’re going to start it, let it come up to temperature. To get a diesel up to temperature, you’re going to have to use the high-idle function of your cruise control. The trick is to let it low idle until the oil pressure comes down to just above the normal operating level (on ours, to 50psi). Then bump it and wait on the pressure to come down again. Most big diesels need to turn at least 1200 RPM to avoid damage to the turbo and injectors. A mechanic actually recommended our Caterpillar C-9 turn 1400 RPM at idle. The problem with idling low is “glazing” – the build up of varnish from incompletely burned diesel passing through the cylinders, valves, and especially the turbo charger. Long story short, just bump up the idle as soon as the oil pressure is low enough to not stress the system.

Hydraulic leveling controller

Oh NO! It Wasn’t the Board! Except, It WAS the Board. LOL

In yet another episode of Adventures with the Purple Monkey, we once again explore what happens when you expect an outcome, but you don’t get it.

First, we’ll set the stage. We were called out to a private residence where a fifth wheel was “stuck” in the owner’s yard, they believed due to locked up brakes. Upon arrival we observed the recent generous rains had allowed the wheels of the camper to sink into the ground several inches. The wheels on the camper did not turn as the truck had managed to pull it a few feet, but instead plowed up the ground, pushing the displaced sod and dirt in front of the wheels and leaving them in quite a hole. The owner did the smart thing and got an expert involved when faced with this unfamiliar situation. Just hooking a tractor to the truck and pulling could’ve caused serious damage to the suspension (at the very least).

The way we fixed the situation will generate some hate, but we used the rear jacks to lift the wheels out of the holes. This was a safe option because several requirements for this kind of move were met (the throw required to clear the ground was short, the jacks weren’t sinking on blocks to spread the pressure, the jacks were oversized for the camper, etc). You shouldn’t try this move yourself without knowing exactly how the jacks can be damaged and avoiding it. Also, you definitely don’t want to create a situation where the camper could bend a jack and fall on something or someone. That’s a life safety warning to be taken seriously.

Once the wheels were up, the first order of business was confirming our suspicion that the brakes were not locked up. To the owner’s complete amazement, they spun freely. If you’ve never tried to pull a heavy camper on wet ground, be prepared for this effect. With several thousand pounds resting on the wheel bearings, they don’t turn as easily as they do when suspended. When on slick wet grass, sand, or mud, if the friction between the ground and the tire is less than the friction at the wheel bearing, the wheel just drags along. We’ve seen it on our own fifth wheels many times.

Next was to get this camper out of the yard and onto the driveway. To do this, we simply used lumber under the wheels to get them up out of the holes and provide a ramp for them to travel past the troubled spot. Note that none of this would’ve worked if the ground were still saturated (it was now several days after the owner’s initial attempt) without building a little road under each wheel track all the way to solid ground.

After we got the camper onto the driveway, the next phase of the operation started. The owner disconnected the truck from the camper and showed us the second complaint: auto-level failed. The hydraulic motor ran for a while, but nothing at all moved. The starting position was from hitch level with nose high, so the first phase of auto-level to drop the nose wasn’t working. Here’s where things got a little weird. The owner then reported that manual mode didn’t work on the outside control panel, so we went to the inside panel. We knew there wasn’t a problem with the hydraulic valves because we’d used every single jack to get the camper hitched and pulled out of the hole. We experimented with manual mode and discovered the zero point was good and the camper could be leveled manually. I called LCI for confirmation and they agreed: It had to be the control board. The smoking gun was the outside control panel not working.

This was an aftermarket warrantee job, so we had to get approval for the replacement of the controller, which wasn’t cheap. LCI didn’t mention to us the model of controller we were replacing was deprecated in favor of a new one. We got approval and order the updated version. When it arrived and we installed it, we found the second thing LCI didn’t tell us: Upgrading the leveling controller to the new version meant needing to upgrade the touch screen interface to the new version as well! This was very annoying to us, but much more annoying to the warrantee company. After verifying our reason for adding an extra $1000 to the repair quote, they approved it. We had waived the second trip fee, which was not covered under warrantee, but now a third trip was required that was really LCI’s fault. We didn’t think it was right to charge the customer, so that’s two trip charges unpaid if you’re keeping track.

What happened next was just what happens when you’ve already had too much of a situation and just want it to be over. If we’d gone out there like it were any other day on the job, it would’ve gone differently because we would’ve had our critical eyes on everything and not the blinders of “let’s get this over with”. We installed the new display and it finally saw the new leveling controller. But, to our complete dismay, when attempting to auto-level, the hydraulic pump would run for a while and the attempt to level would fail! W.T.H?! We reset the zero point and tried again. FAIL! Were we finding, after three trips and a couple thousand dollars in parts it wasn’t a problem with the board and we missed the real problem?! This was turning into a nightmare fast.

We called LCI tech support (which is quite good, BTW) and they walked us through trouble shooting. To our complete embarrassment, they solved the problem by simply forcing us to notice the camper didn’t have enough room to do the required 3 inch below level nose drop that starts the whole leveling process because the owner had put Anderson cans under the landing gear. Then the lightbulb went off that the behavior was indeed NOT the same. Originally, the gear didn’t move at all and there was plenty of room for a nose dip if it had. With the new controller, the nose dipped, but stopped when the gear couldn’t go any further. To confirm, we hitched to the truck, removed the cans, and BOOM! It worked. Of course. The outside control panel now also worked.

If you’ve read many of our blog entries, you might see a pattern with the Purple Monkey episodes. It’s never that there is some mysterious force working against the situation. It’s always that something hasn’t been seen, or worse, has been seen, but has been ignored.

The lesson remains the same: Be careful what you expect because it doesn’t really mean much compared to what is real.

(NOTE: To be absolutely clear, no customer is ever asked to pay for the time it takes us to sort out our own learning experiences. We always look at how long a job should take much more than how long it actually took.)

Dicor sealant breach

Q: Dicor Is a Sealant, Right? A: No, Not in the Context of an RV.

We did a lot of roof jobs this summer. We used many tubes of Dicor 501. But why? What is the Dicor supposed to be doing? Most people, even RV repair techs, think of Dicor 501 Self-Leveling LAP Sealant as a… wait for it… sealant. It says so right on the label, right? So, what is this stuff, really, and why is it drizzled all over your camper’s roof?

For brevity, I’m going to call “Dicor 501 Self-Leveling LAP Sealant”, as well as its non-sag version, just plain “Dicor”. Be aware, however Dicor is a brand that has many other products in 10.5-oz calk gun tubes. Most of them have the same thing in common: They are heavy in solvents. Solvents evaporate very quickly at first, causing the substance to “set up”. The evaporation of the solvent slows more and more, but never actually stops until it’s all gone. This is why fresh Dicor is like puffy bubble gum, but old Dicor is chalky, cracked, and flakes away easily.

What happens if you try to seal something with a chalky, cracking substance? Of course, it leaks. But here’s the interesting thing: The Dicor on an RV roof isn’t actually sealing anything (if the manufacturer was doing their job). Under the Dicor, wherever you find it, there is an actual sealant. Sometimes it’s a waterproof adhesive, sometimes it’s butyl (like window putty), sometimes it’s a flexible adhesive like Lexel, sometimes it’s a Sikaflex product (read up on those on your own), and sometimes it’s even plain old silicon.

A BREAK FOR A SERIOUS WARNING: DO NOT EVER, E.V.E.R. put silicon on an RV unless it was already there from the manufacturer. Nothing will ever stick to that spot again except silicon without stripping the material completely. In most cases, that means destroying a piece of your camper to undo the mistake! Ok, back to our program….

If it’s not sealing things, then what is the Dicor doing up there slathered all over everything in sight? It is actually acting as flashing, the term for anything that redirects water away from water sensitive areas. The reason for flashing is not to create a seal, but to protect one from water.

Water is one of the most destructive substances on Earth. It sounds weird but think about the Grand Canyon for a minute. Water is abrasive, acting as more or less super-fine-grit sandpaper in flowing liquid form. Water is chemically active, aiding in all sorts of oxidative processes like rust. Water has a tendency to rehydrate any sort of water-based adhesive over time making it no longer adhesive. And most dramatically, water expands when it freezes. This last point has led to the absolute obliteration of many campers (including one of our own) when a roof leak sprang in storage over the winter and water made it into the wood. The water literally explodes the wood fibers away from each other as it freezes and expands destroying the structural integrity of the wood.

Taking all this information in and jiggling some thought with it, it’s pretty easy to arrive at a conclusion about water leaks on a camper: If the leak has happened, it’s not just because the Dicor failed, but also because the REAL seal under it failed too. This means to reliably stop the leak, it’s not just about replacing the Dicor, but also about repairing the broken seal under the Dicor. Otherwise, it’s only a matter of the solvent evaporating before the leak returns. Sometimes, especially on older campers with severe damage, this kind of repair is the best because it is the most cost effective, but it’s never permanent. Doing this kind of “repair” on a newer camper is just sealing the fate (see what I did there?) of the camper.

Having said all that, the first line of defense is the flashing. In many ways, keeping that flashing viable is the single most important thing to keeping your camper from literally falling apart. An inspection schedule of at least twice a year is needed just about everywhere in the world for different combinations of environmental factors (e.g. sun, freezing, etc).

Almost all campers also have a generous supply of exposed sealant. Most campers have many seams which are sealed with silicone or silicone-like substances like Lexel. If you touch up one of those surfaces, make sure you know which it is and heed my warning above about silicone. Because a camper goes through an earthquake and a hurricane every time it moves, we inspect our own as part of the setup process when we arrive and, if we’ve seen freezing, heavy weather, or been stationary for more than a couple weeks, we inspect it again before we leave. We highly recommend you do the same. It’s all about keeping the rain in the outdoors!

Stay safe out there!

Half cleaned filthy AC evaporator coil

Professionally Cleaning an RV Rooftop Air Conditioner

The picture attached to this post is what we found while servicing a rooftop air conditioner for someone who thought they were properly maintaining it. They stopped by to ask if the AC special we posted on our sign included “anything special” because every month during the summer, they washed the air return filters and sprayed off the condenser coil with a hose (without removing the outer cover). They were a little shocked to learn exactly how much is involved in a real semiannual AC service. The attached picture is of the evaporator coil, which is the coil you can see looking up through the air return on units with an exposed “bottom unit”. It obviously needed our help.

Here is a rundown of the things we clean and check when doing semi-annual maintenance on a rooftop air conditioner, regardless of brand. The list isn’t exhaustive because some units have extra features like condensation pumps which require extra steps.

  1. Remove the rooftop cover, remove any debris, especially wasp/dirt dauber nests. These pests can block airflow and airflow is everything.
  2. Measure the compressor amp draw at start and run. High loads can indicate impending compressor failure, low loads can indicate low refrigerant.
  3. Measure the “Delta T”, the difference between intake air temperature and cooled air temperature. This should be around 22 degrees in most cases, but if it’s higher than 30 degrees, it’s probably a sign of air leaking between the intake and cooled sides. If it’s lower than 20 degrees, it’s probably a sign of bad airflow through the unit. (These temperatures vary with humidity!)
  4. Measure the “Delta I”, the difference between the ambient air outside the intake, and inside the intake. A difference of more than 2 degrees means air is leaking between the intake and cooled sides and the leak must be found and taped or otherwise sealed.
  5. Inspect for oily residues. Refrigerant leaks leave behind the oil used to lubricate the compressor.
  6. Check the condenser fan blade spins freely. Fan motors have brushes and bearings which wear over time.
  7. Clean the condenser coil and straighten any fins which can be straightened without causing further damage. There are several no-rinse condenser coil cleaners on the market. Our favorite has a brush built into the cap which also helps to straighten fins. Every square inch of blockage or restriction adds up to loss of cooling efficiency and puts extra load on the fan and compressor.
  8. Remove the evaporator shroud, noting any gaps which would allow air to pass through the shroud. Remove any debris.
  9. Expose the capacitors then discharge, disconnect, and check tested capacitance against rating. Double check correct capacitors are installed. The best chance of saving a fan motor or compressor is to catch a failing capacitors as soon as possible. A bad capacitor will burn out a compressor given enough time. Replace any that are not up to spec.
  10. Clean the evaporator coil and straighten any fins which can be straightened without causing further damage. There are several no-rinse evaporator coil cleaners on the market. Our favorite is anti-fungal, anti-viral, anti-bacterial, and fresh scented. Just like the condenser coil, every square inch of blockage or restriction adds up to loss of cooling efficiency and puts extra load on the fan and compressor.
  11. Check the wiring connections. Loose connections can lead to arching which can start a fire, damage components, or cause intermittent function. Considering there is an earthquake/hurricane with every move, loose connections are more common than you might think. (This is also a great time to check the connections in the breaker box and other fire hazard locations!!)
  12. Replace the shroud, being extra careful to tape all gaps. A lot of factory installs will have a little piece of tape on the corners, but it’s just tape: tape the full seams!
  13. Clean or replace the air return filters inside.
  14. Retest the Delta T and Delta I to make sure everything is working properly. Under normal usage in just about all parts of the country, if the last cleaning was 6 or more months ago, there will be an improvement.

Of course, when we do it, we like to write up our findings so the owner can keep the health stats in their maintenance records. If you do this job yourself, pretend for a moment you’re issuing yourself a report, be detailed, and put it with your maintenance records. Being able to look back at prior tests for a trend is sometimes very helpful and having good maintenance records can also increase the value of your camper when it’s time to sell or trade!

A slide seems misaligned

Should You Put Your Camper Up on Blocks?

When we first saw the slide out room on this mid-sized travel trailer, it seemed like the slide needed adjustment. The owner mentioned the slide had become harder and harder to move during the last year, even requiring extra people to push on the slide to get it to move. This was the beginning of a “purple monkey” from hell and if we ever felt like there was a threat to our 100% problem resolution rate, this became it. This story is about wasting a ton of time and learning yet again, never draw a conclusion and then ignore additional evidence. It’s also about, as the title implies, the hazards of improper stabilizing, bracing, pseudo foundation laying, or any other thing that attempts to hold a camper level/still or “take the weight off” when it’s parked. This is especially true of campers, like this one, which are parked permanently or semi-permanently at a seasonal or other long-term spot.

There was a total of about 8 hours wasted on this job. The list below is just the actions taken, not the result of the action, because the result was always the same: The slide did not retract and slightly pivoted on the arm towards the rear of the camper, furthest from the actuator.

  • Adjusting the slide mechanisms to properly align the slide in the wall, which appeared rotated slightly counterclockwise.
  • Disengaging the actuator arm (aka thruster) from the slide to check the motor function.
  • Lifting the slide with jacks to clean and clear debris from the ramp along the bottom where the slide slides across the threshold of the wall into the camper, which had a lot of sand and even some gravel trapped in it.
  • Lots and lots (and lots and lots) of penetrating oil on the slide arm tubes which showed quite a bit of rust.
  • Removing the gear packs to relieve a possible bind from bad left/right timing.
  • Disengaging the slide arms from the slide wall to move them in and out to be sure they weren’t rusted in place. (Both arms moved freely.)

This list took place over a series of days with a “stop and think about it” in between. We consulted with colleagues who made suggestions and bounced around ideas. That part was not successful because we did not give our colleagues the one vital piece of information which would eventually solve the puzzle. At the end of this list, we pretty much apologized to the “customer”, who, to make matters worse, is also a personal friend. Days went by and as I (Steve) tend to do, I obsessed over it, going over every detail over and over in my head.

We dropped in to see the friend socially several days later and of course conversation came back around to the slide situation and what to do about it at the end of the camping season when the slide would normally be retracted for winterization. It was then that the most eye-opening stroke of luck happened. My friend decided to check again to see if the slide was still stuck but pressed the wrong slide switch. The kitchen slide was also now stuck! We’d all been having drinks, so we all agreed we’d look into this further tomorrow. My first thought was that I’d somehow screwed up the kitchen slide while doing all the work on the living room slide, which is exactly across from it.

The next day, it was time to throw out the bath water, so to speak, and start on this with fresh eyes. This approach to solving this kind of elusive problem has worked in RV repair and every other endeavor since the very first time, decades ago, I realized I had duped myself with confirmation bias. I had decided there was something wrong with the slide mechanism and then bent everything I saw to fit that decision. With fresh eyes on the shocking evidence that now both slides were jammed, it was time to have a look around for a better opinion.

That’s when I finally saw the jack stands under the camper as a potential threat. These jack stands were sitting on extremely sandy ground, and it had been an unusually rainy spring. The stands were positioned at the very front and very back of the frame rails, potentially creating the maximum twist on the frame possible if they were to become uneven. We told our friends to get those jack stands out from under their camper and see how the slides behaved. If you guessed the problem was magically solved, you guessed correctly.

The question in the title, “Should you put your camper up on blocks?”, is misleadingly oversimplified. There are times when it’s a great idea and also times when it is a prelude to disaster. First, it’s important to understand the difference between putting supports under the frame rails and under anything else, especially under slide outs.

This might generate some hate but putting supports under slide out rooms is an absolute never, ever. The frame and walls are designed to have that weight permanently and the risk of even a minor shift in the supports, the ground, the position of the frame, or the tides of the ocean, can cause much more damage than “the weight of the slide out”. In short: STOP DOING THIS.

Second, supporting the frame can be a good idea if it meets three requirements. The supports must be equal, meaning exerting an equal force at every point they meet the frame. This may or may not be perfectly level if the frame is not perfectly plumb. It must be direct support with the jacks or blocks resting directly under the frame rail, not outriggers, suspension components, or crossmembers. The supports must not be able to move relative to each other. “Relative to each other” pretty much means the ground can’t sink leaving the supports out of balance in the force distribution on the frame. It was this last one that actually twisted the entire camper out of shape and trapped the slides in the walls in our friend’s case.

We hope you enjoyed our embarrassing story and took the two important lessons to heart. If you’re going to use supports, use them correctly, and much more importantly, never let an assumption overrule evidence.

Stay safe out there!

A remote control chip and receiver chip with voltage converters.

That Moment When You Realize There Was Never a Wire!

So far, this has to be the most interesting job we’ve ever done. The story has so many angles, it’s hard to decide where to begin. Because it’s sure to be a “too long didn’t read”, I’ll break it down into sections.

The Customer Concern

A very nice fellow staying across the campground from us at Buccaneer State Park in Waveland, MS, stopped by one day to ask us to have a look at his front furnace, which would not fire up. He had bought his 2006 Fleetwood motorhome from an estate and knew nothing of its past. The front furnace not firing might be related to something a little odd in plain sight.

The front air conditioner installed at the factory was a Coleman Mach configured as Zone 1 with a Zone 2 in the bedroom. It had been changed out for a Dometic at some point and a second thermostat installed for it. The thermostat was aware of the furnace, but the furnace would not activate. The owner believed the installation of the Dometic was in some way incomplete or faulty and wanted us to check it out.

The Purple Monkey

A “Purple Monkey” in the NRVTA world means basically a wild goose chase. We checked out the Dometic and everything had been configured properly for it to control the front furnace. However, the relay in the AC control box that should be connected to a wiring harness to send the 12VDC activation signal to the furnace was not connected to anything at all. The Coleman harness was still there, so it looked like all that needed happen was hooking up the usual wire and we’d be all set.

One should NEVER just apply voltage to a wire in an RV without verifying the wire isn’t shorted somewhere and actually terminates where you think it does. The good news: the wire wasn’t shorted to ground and had no voltage on it. The bad news: it also didn’t terminate anywhere near the furnace. A tone generator was able to “hear” the wire to somewhere near the edge of the roof, but then it just disappeared. We decided to trace it from the furnace up when we found the REAL problem.

Are You Serious?!

The furnace connection on this Atwood is a 6 pole plug which SHOULD have four wires on it: all 12VDC, positive house power, chassis ground (aka negative), power out to the AC control box, and a line in from AC control box. The wire coming back from the AC control box, which normally activates the furnace with 12VDC, was MISSING. We pealed back the vibration shielding on the umbilical to the slide out where the furnace was mounted and it wasn’t there either! Apparently, the factory forgot to include the wire in the lower section of the harness altogether.

We went outside and scoped the exhaust port, and sure enough, this furnace had NEVER been hot. It was basically brand new at 15 years old.

No Way It’s Worth It

Running a new wire inside a fully built coach is a nightmare. If it can be done at all, it takes a lot of time (hence expense) to do it. This job would’ve definitely been on the long side because it’s pretty much three separate jobs to get the wire from the roof to the wall, from the top of the wall to the bottom of the wall, and then out into the slide out. Just making it right would’ve cost hundreds (if not thousands). It was time to think outside the box.

What Are My Options?

  • Installing a third thermostat which only operated the furnace would’ve also taken a lot of time and the placement of that thermostat could not have been very effective in the floor plan of the coach.
  • A manual On switch that simply fired up the furnace by giving it the 12VDC signal is not necessarily a safe way to solve the problem. If the furnace’s thermal cutoff failed in the on position, it would definitely be a fire hazard.
  • Just don’t use it? The whole reason it became a concern is the owner planned more cool weather camping this year. Electric heat is good, but nothing compared to the power of propane.
  • Do something WAY outside the box. << This one!

Scotty, Beam Me a Furnace Activation Signal

I’d been cruising Facebook a few days before and just happened to get offered an Amazon ad for a pair of chips that use a 433MHz encrypted radio signal to activate something via a relay. The transmitter side of it is basically the guts of a key fob for power door looks. The receive side just knows how to open a small digital relay. This was the perfect time to go mad scientist!

We paired the little chips with voltage regulators to bring the house 12VDC power down to a friendly and consistent 9VDC. This step might have been unnecessary because the chip claimed its maximum voltage was 12. We know the alternator on a motorhome produces 14VDC and if the owner ever installed LiFePO4 batteries, they need 14.4V to balance the cells. We thought it best to spend the extra ten bucks on some cheap insurance and use regulators.

The remote control chip was powered up by running house 12VDC into one side of the AC control box heater relay. The other side of that relay powered the regulator which powered the chip and activated the radio signal.

The regulator for the receiver control chip was connected near the furnace to 12VDC house power through a kill switch mounted on the outside of the cabinet the furnace is hiding under. One side of the relay was also connected to the same 12VDC source (which the chip was rated to handle). The other side of the relay was wired into the furnace connector finally providing that fourth missing wire.

PRESTO!

It seems after all that, the conclusion should be more exciting, but it simply worked. The total cost of the project was around $150 including parts and our time to find and test the setup, a figure that was well worth it to the owner and vastly less than any other route to a solution.

We really enjoyed this project because the nerd factor was 11 out of 10. There are a few takeaways in retrospect:

  1. Never assume anything.
  2. Do the proper diagnostics if you want to avoid the dreaded Purple Monkey. We would’ve looked like idiots if we’d just tried replacing the furnace control board. Who knows, maybe the change to the Dometic AC was also an attempt to make that furnace work.
  3. Don’t just think outside the box, understand there IS NO BOX!